¶ Publishing Flow
Our publishing workflow is a straightforward process that can be completed in a few easy steps.
¶ Create a Project
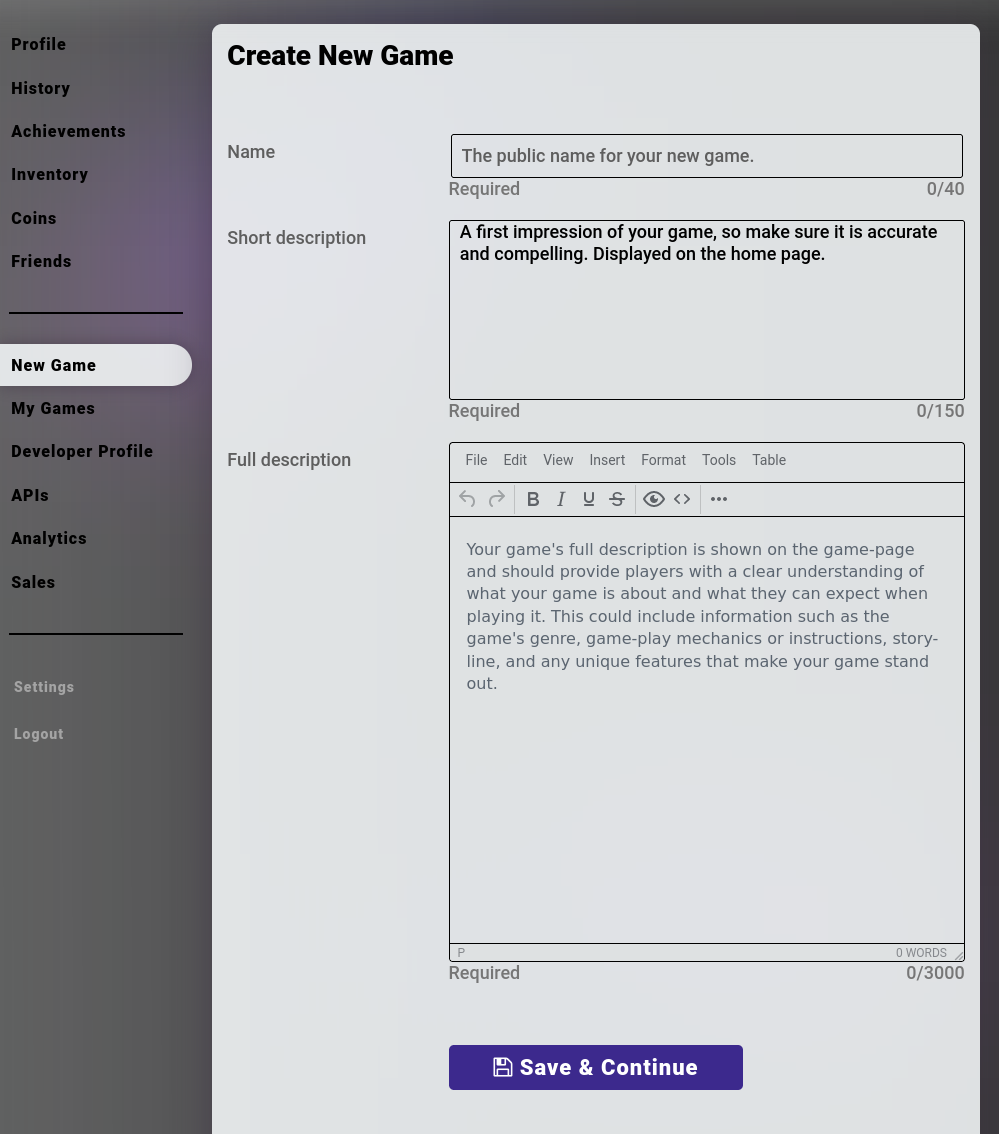
To create a new project, navigate to the New Game menu option on the left side of your screen. Here you will be asked (required) to provide:
- The public name for your new game, which cannot be changed afterwards.
- A short description, which is used as page-meta when sharing the link.
- A full description, which is shown on the game page and should provide players with a clear understanding of what your game is about, and what they can expect when playing it. This can also include potential credits (e.g. 3D model licenses).
To finalize creating your new project, click on the 'Save & Continue' button at the bottom of the page.
¶ Edit a Project
You can look up your new project by navigating to the My Games menu option on the left side of your screen. By hovering over the project tile, you will have the option to either 'Edit' or to 'Delete' your newly created project. Please be aware that deletion is permanent.
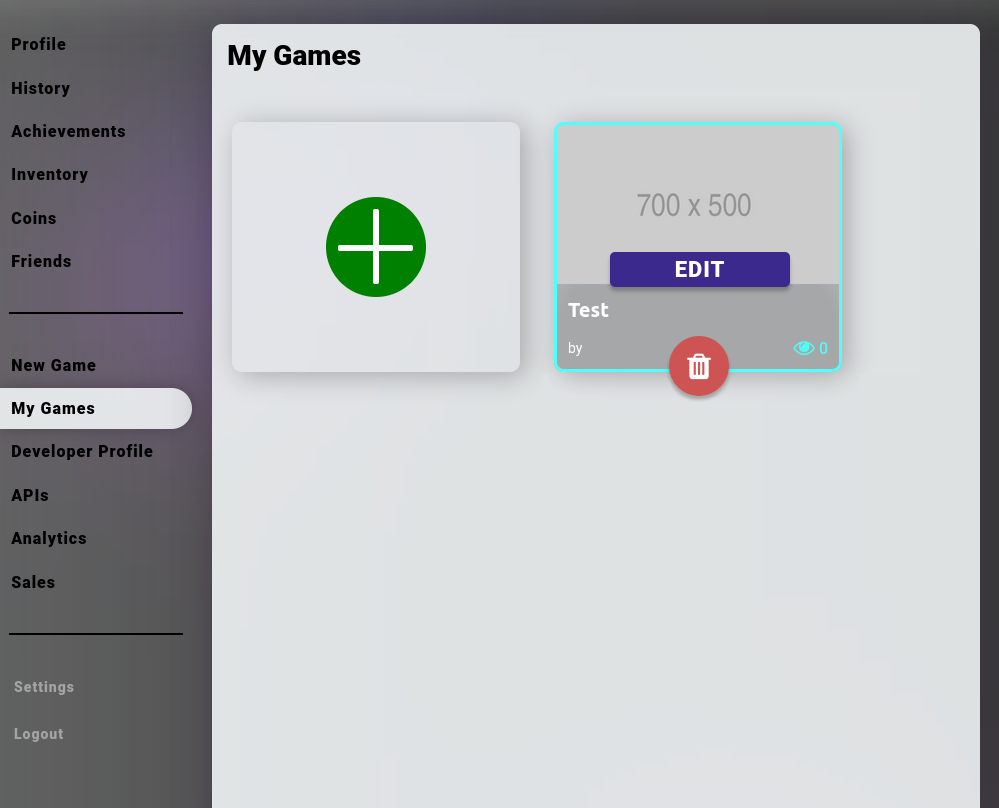
Clicking on the 'Edit' button will give access to the extended setting and options menu for your newly created project, which consist of the following tabs:
¶ Description
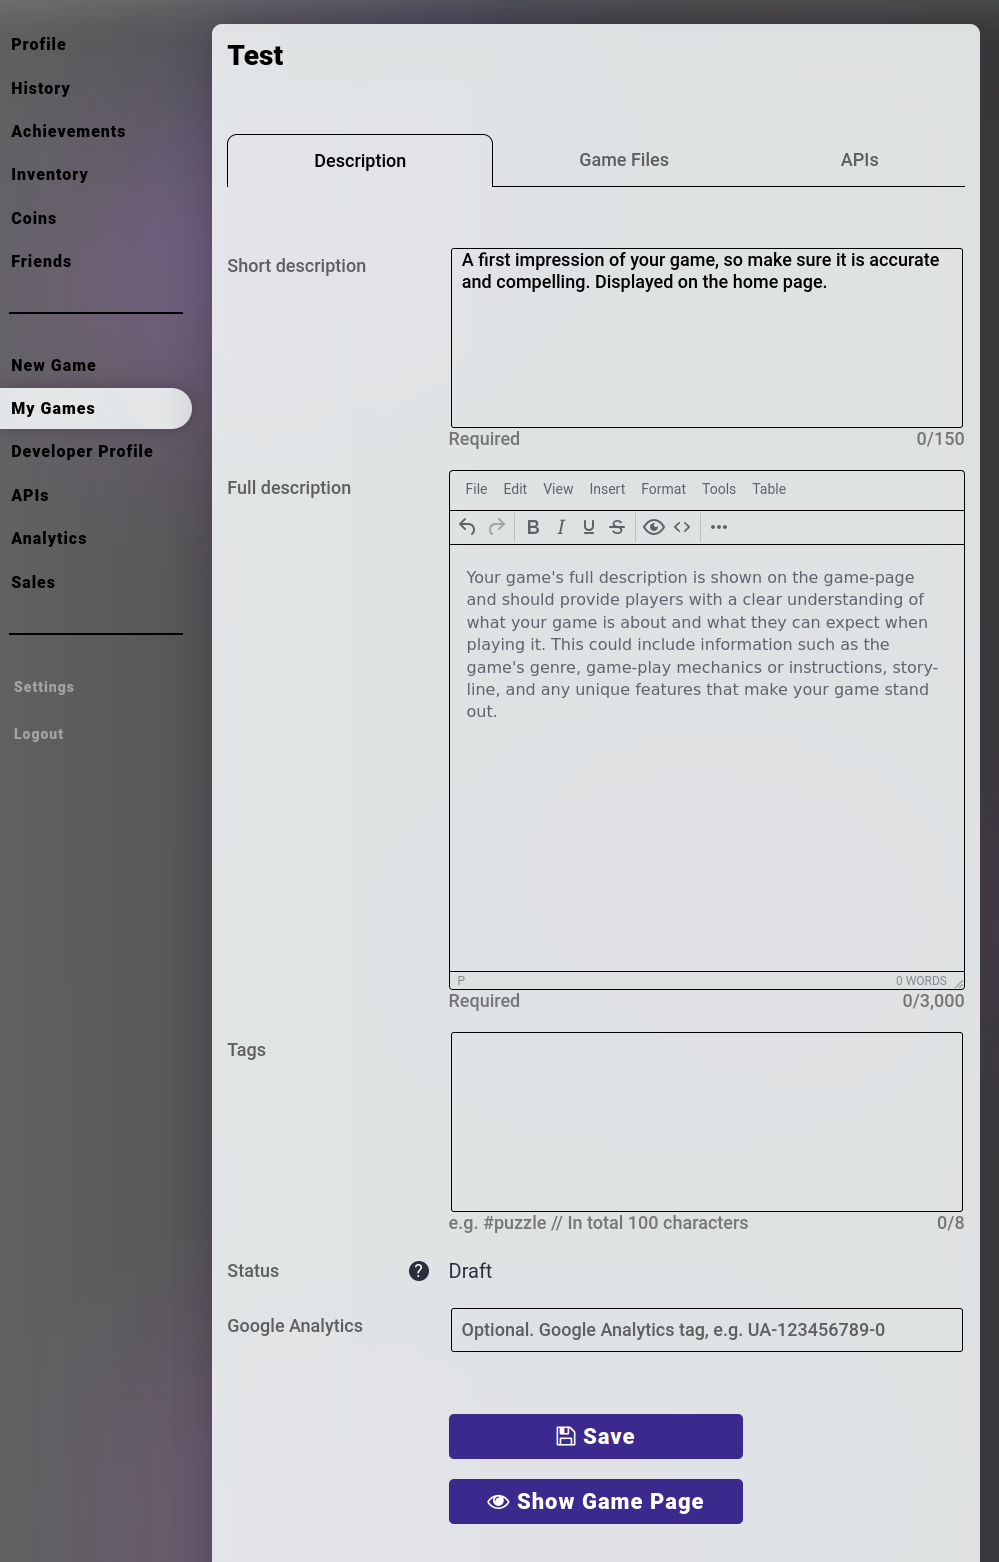
Under the Description Tab you are able to adjust the information you previously provided (the short & full description of your project) and provide additional Tags e.g. #adventure, #puzzle etc
Please be aware that all description changes will go live immediatly upon saving.
You will also see the 'Status' of your project, which is currently set to 'Draft', as you have not submitted any build yet.
Additionally you are able to include a Google Analytics tag into your project for analytics tracking.
By clicking on the 'Save' button you save all changes made and/or additional information you provided.
By clicking on the 'Show Game Page' button a new browser tab will open that shows a preview of your game page. This link is not public yet, so you are the only person able to view it.
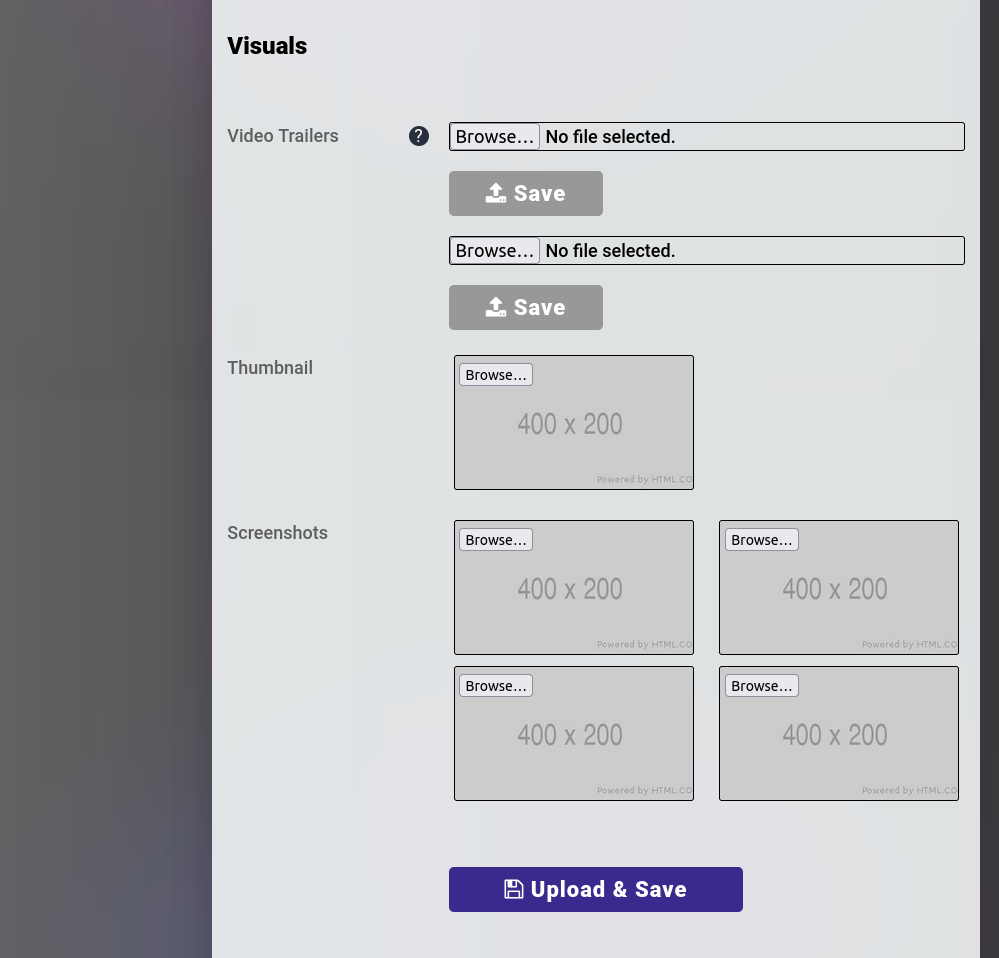
At the bottom of the page you will find the Visuals section where you can upload the following media content:
- Video trailer(s)
- Thumbnail
- Screenshot(s)
¶ Game Files
Under the Game Files Tab you are able to directly upload your game build and test it by clicking the "Preview" button to ensure it's working correctly.
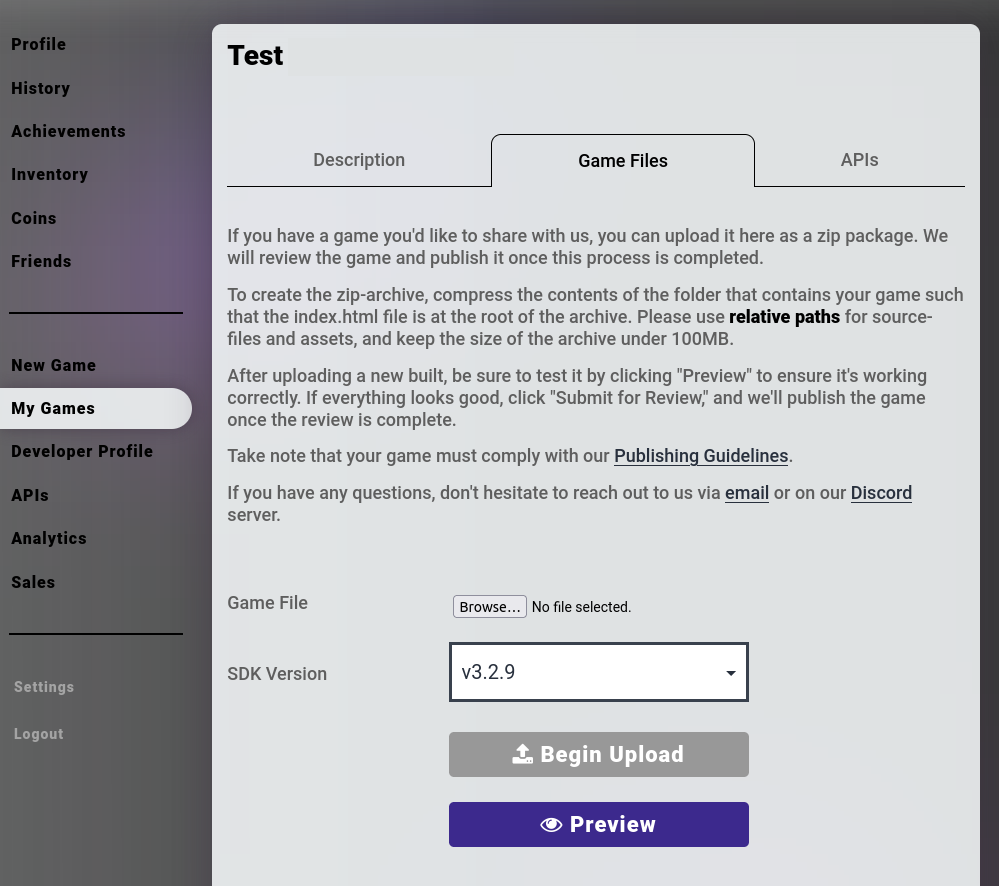
If you have uploaded multiple versions of your game, you will also be able to see which previous versions have been approved. Similarly, you can check on the SDK versioning.
¶ APIs
Under the APIs Tab you are able set up, change and manage the various heyVR APIs that can be used to enhance the gameplay and overall user experience of your game.
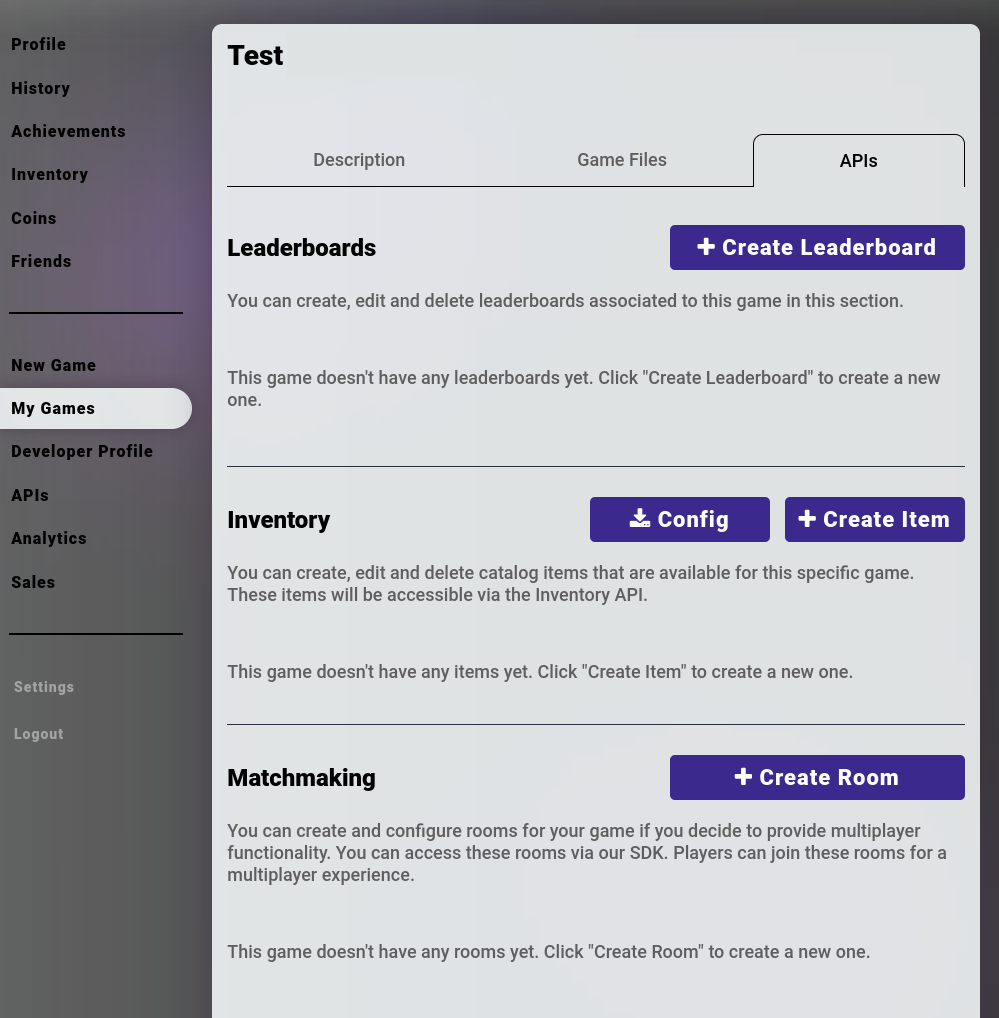
For detailed documentation on how to use our APIs and how to set up the heyVR gameplay SDK, you can head over to our Using APIs section and our Gameplay SDK documentation
¶ Upload your Build
After you've created your project, changed and/or provided additional information and media - and configured the APIs for enhanced gameplay - you can upload your game build using the upload wizard under the 'Game Files tab'.
Make sure to acquaint yourself with some of our technical and non-technical Requirements and Best Practices before uploading your build.
¶ Test and Preview your Game
Once uploaded, you can preview and test your game to make sure everything is working as expected before publishing. You can do this by navigating directly to the game page (https://www.heyvr.io/game/yourgame), clicking on the 'Show Game Page' button under the 'Description tab' or clicking on the 'Preview' button under the 'Game Files tab'.
¶ Submit for Review
Once you're satisfied with how everything looks and your game is working as you intended, you can simply submit it for review by clicking the "Submit for Review" button under the 'Game Files tab'.
Make sure to click the "Submit for Review" button. Without submitting your upload, we cannot review your build and the game will not be published on heyVR.
We will test your game on multiple devices and platforms to ensure that it works as expected for all users. After a quick review, we'll inform you of any issues. If everything looks good, you'll receive a notification that your game is published to our platform and available to the whole world!
After your game is published, you will be able to monitor its performance and user engagement through the heyVR Developer Dashboard, which includes tracking metrics such as the number of views, interactions, and user feedback. Not all of these features are available as of yet, but will be so in the future.